Animation
a lot of programs do image editing, texturing, drawing, etc but the main thing that kept me in Clip
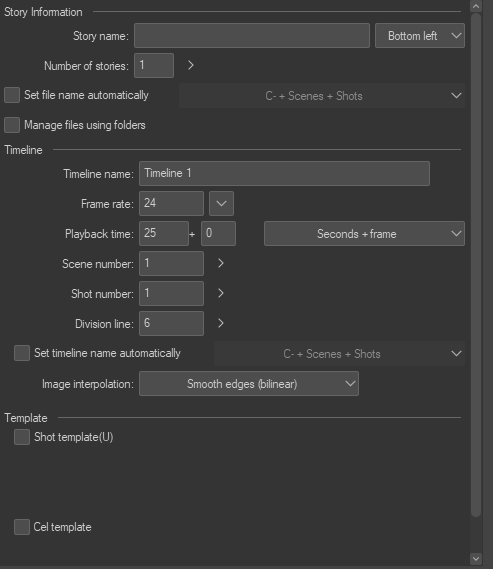
studio is that the animation system are easy to use. For example, if u want to make a dum gif of a
drawing I can just extend the animation timeline in the workspace menus and start making an
animation with the possibility of adding sound effects and match more
having the same tools for drawing and animation is so goooooood
if u known animation terms most of the timeline settings are self explanatory
timeline modifiers/entities/modes
(again all of this is my interpretation i know I am making a lot of assumptions here, the names and
definition can and will be wrong, pls don't kill me :/)
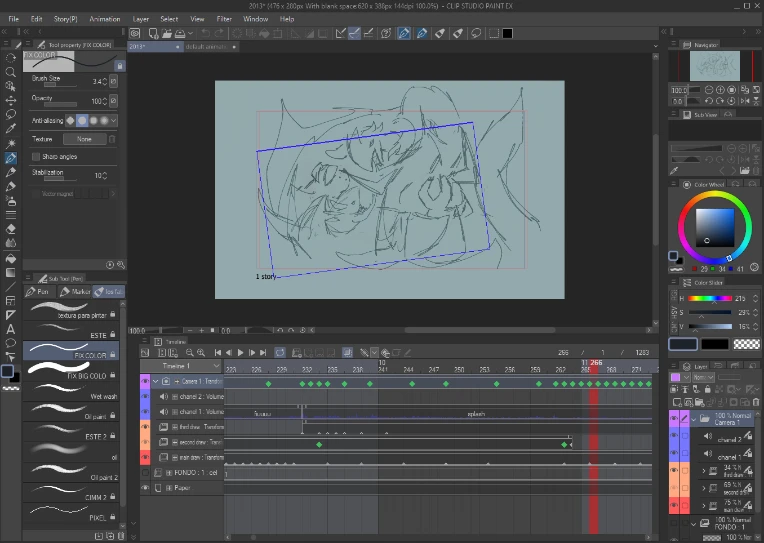
header
the vertical red line is the header, this is what's is currently being display
onion skin
this displays a color silhouette of the last/next frame u can configure it in the animation settings
play mode
there is a stop line (u set it up with the playback time but u also can also drag it out manually after the
settings) everything between the starting line and the stop one is in the video. If u enable loop mode
the video will start again once finish
timeline elements
it reminded me of the flash 8 animator (I was so long ago that i cant remember a thing about flash
outside of basics) the mayor change is that you need to keep a folder structure for your photograms

clip
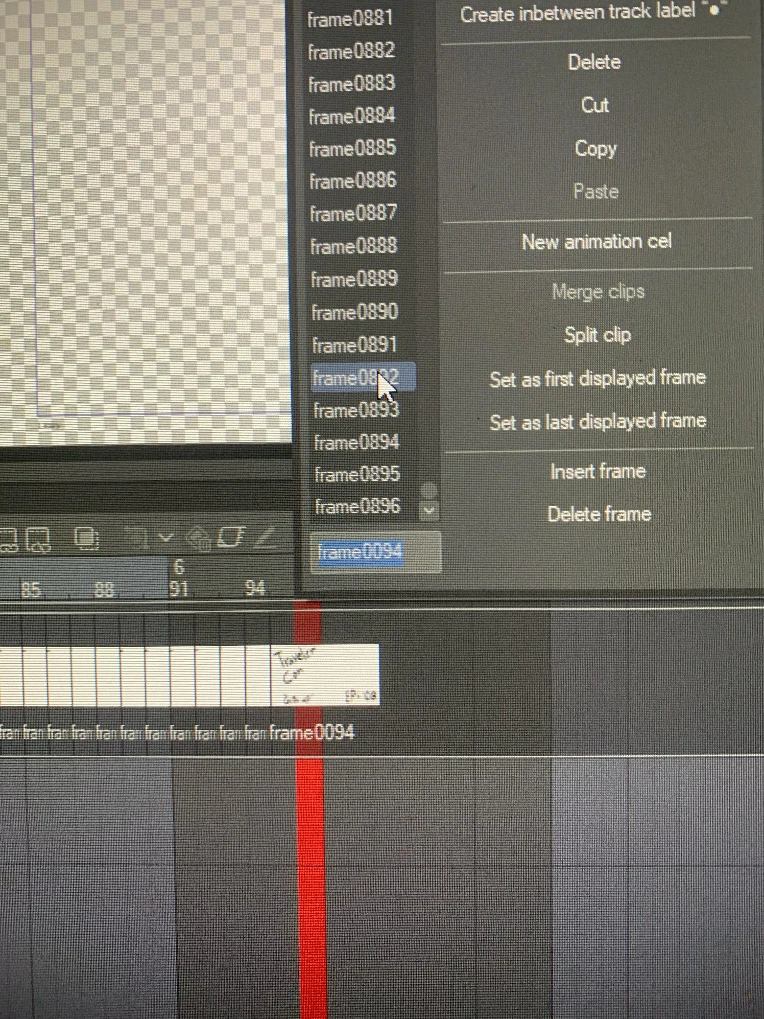
those horizontal gray lines are called clips by the program, the space that they are on is supposed to
be a folder in the time line and each cel in them represent 1 frame according to your specification in
the time line settings. The clips can be split so any transforms or properties aren't share between
them, if a clip is empty it means that is not visible in that frame.
cels
this are the current assigned layer to be visible of that respective clip/folder, if in cel mode, the name
of the layer should be visible otherwise they appear as those little triangles at the bottom of the clip.
cel controls:
1. new animation folder: creates a new layer folder
2. new animation cel: creates a new layer inside the current frame/clip/folder
3. specify cels: lets u pick the current cell of the frame/clip
4. delete specified cels: lets u clear the current cel of the frame/clip
keyframes
this need to be enabled
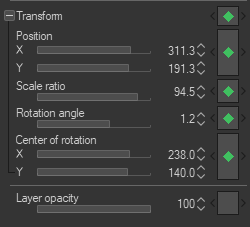
these are the current transform value of a given cel at that frame in the timeline, if the keyframes are
enable in that clip the program interpolates the changes in values in frames
keyframe controls:
5. disable keyframe editing: disables the use of keyframes in the current clip
6. Layer Mask I don't know :/ i cant remember
7. deletes the current keyframe
8. creates a keyframe and it lets u decide the interpolation
this enables u to change all the values of the cel
u cant modify cel values once keyframe mode is enable u need to disable it for any cel changes and
that is ...
the FUKING KEYFRAME system
using keyframes complicates the timeline a little, since there is no base transforms values for clips any
changes are drag along to the next clip, witch at a certain point makes it difficult to center images, that
why u need the good practice of splitting the clips at the start so there is a beginning mid an end
coos the interpolation is automatic once enabled.
this is annoying + the fact that u can t animate the howl scene in one go means that u need to
have a separate workflow for the movement and drawing of a cel since the transform changes
aren't track in cel mode making it SO TEDIOUS ++++ the onion skin doesn't do keyframes
neither reeeeeeeee
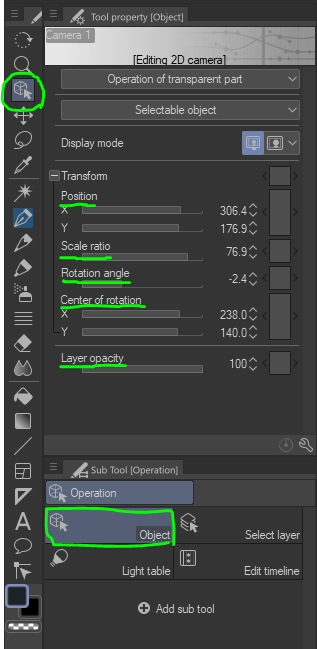
the 2D camera
the camera is just a clip/folder that's always in keyframes, in the the viewer appears as a blue
rectangle, everything outside of it isn't in the frame.
Having the camera work inside of the cel structure fells so good, any element outside of the camera
isn't affected by its movement also there ARE onion skins for the camera movement